Help Center
New to Archiva or looking for a quick answer? Use the Walkthrough for step-by-step guidance, or switch to FAQ for quick answers.
How to use Archiva
A simple guide from signup to everyday use.
-
Step 1
Create your account
Sign up your organization, set your password from the email link, and activate your account.
- Your organization signs up with a name and admin email address.
- Check your inbox for a link to set your password and verify your email.
- Once activated, you have full access. Until then, you can only finish your profile.
Tip: Didn't get the email? Check spam, or ask your admin to resend the invite.
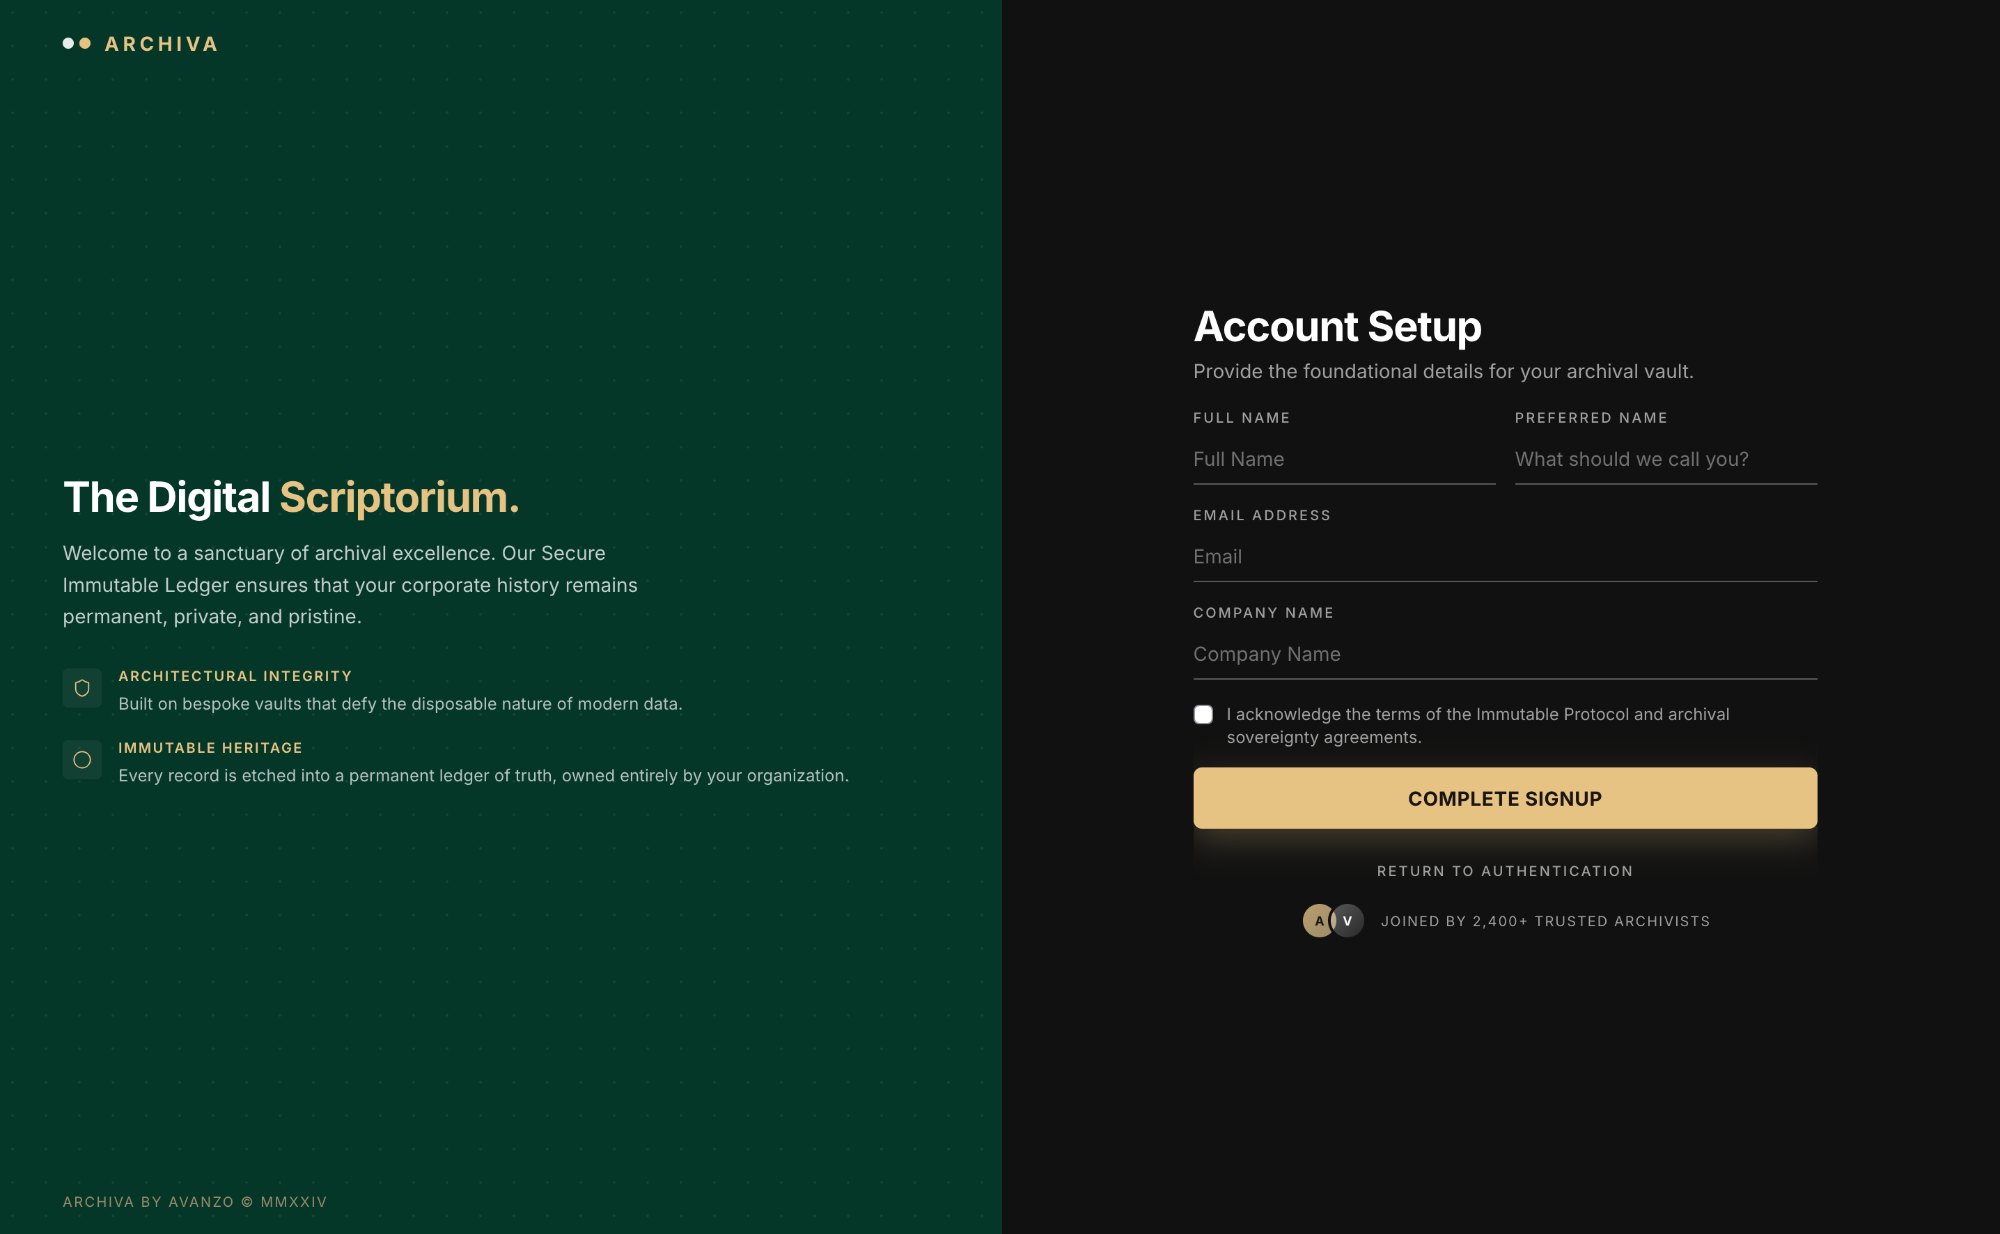
Start by creating your organization account -
Step 2
Set up your team
Invite teammates and make sure everyone has the right access before work begins.
- Invite people from your admin settings.
- Give each person a role and add them to the right team groups.
- Everyday users need both — a role alone is not enough to see templates or documents.
- Your organization starts with a default team group on day one.
Tip: Organization admins have full access and do not need team group assignments.
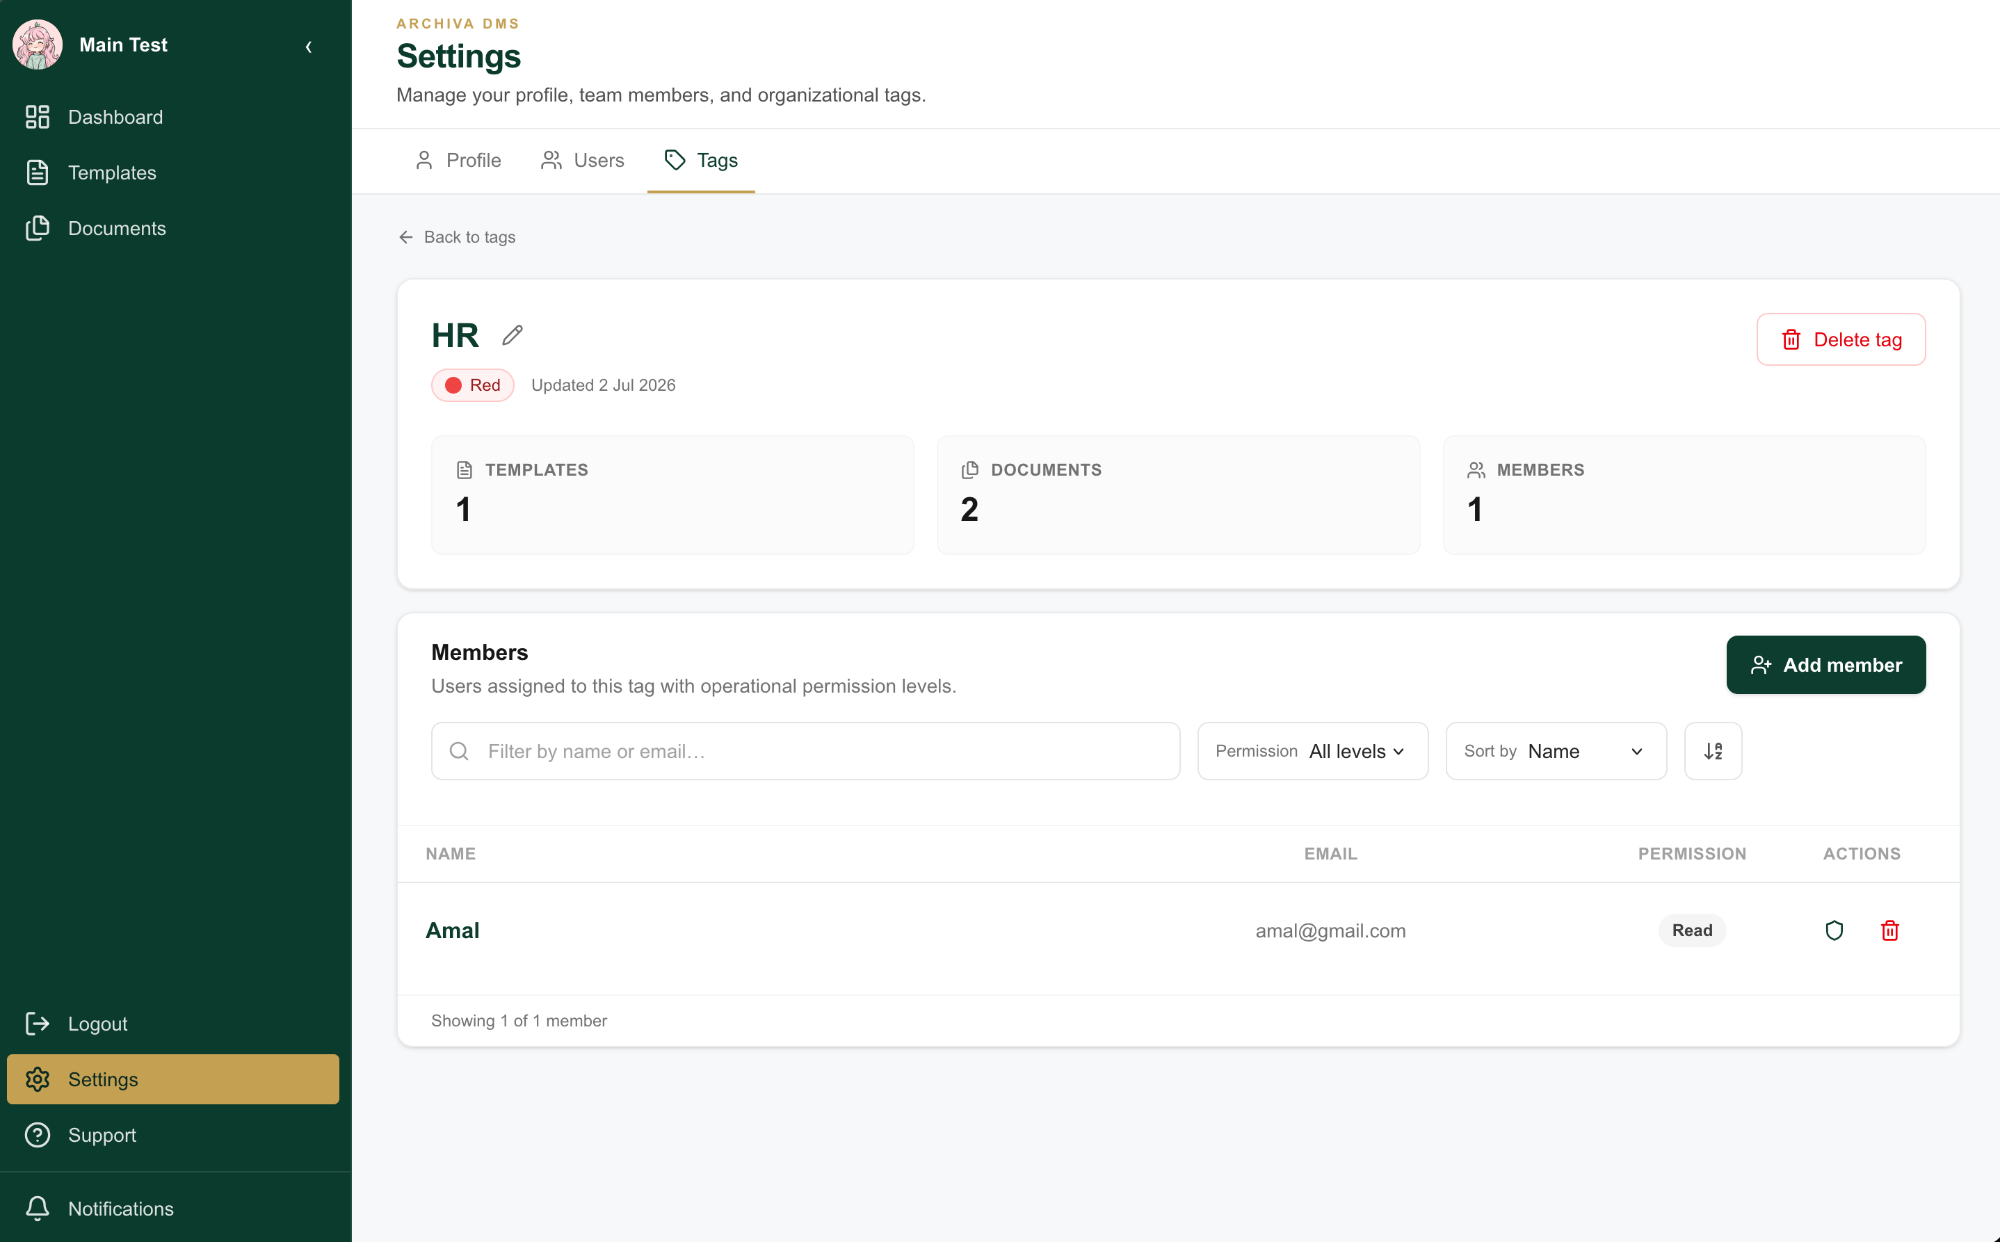
Assign teammates to tags with the right permission level -
Step 3
Build document templates
Upload a base file, place fields, and choose who can use each template.
- Upload a PDF or image as your starting point.
- Place fields where information should appear — names, dates, logos, document IDs, and more.
- Save your template. Future edits create a new version; older versions stay available.
- Choose which team groups can read, use, or manage each template.
-
Step 4
Generate documents
Fill in a template to create a signed PDF, one at a time or in bulk.
- Pick a template, fill in the fields, and generate a signed PDF.
- Need many at once? Download the CSV sample, fill it out, and upload — up to 500 rows per batch.
- Every document is automatically signed and tamper-proof when created.
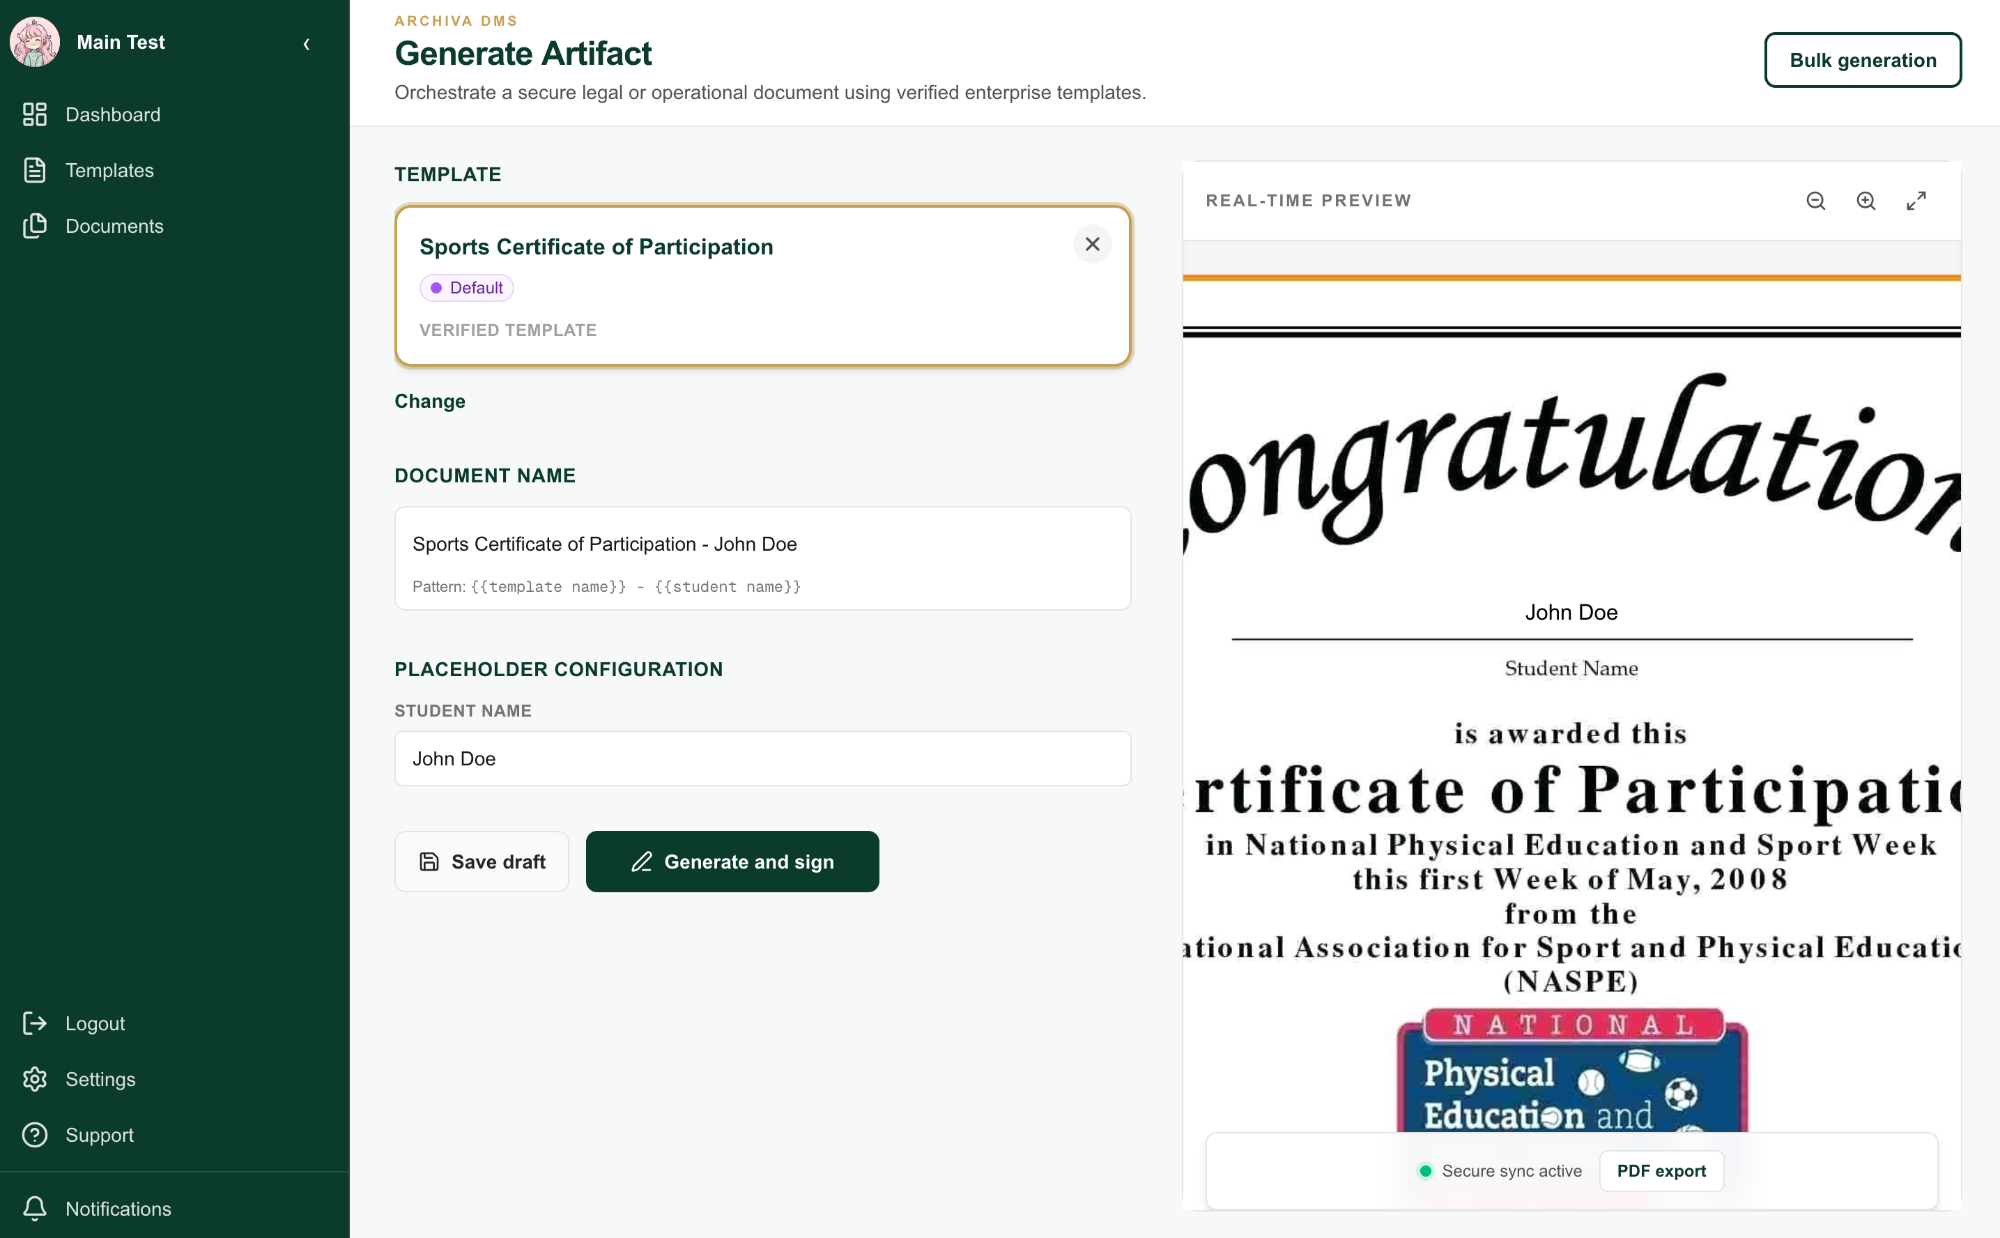
Pick a template, fill in the fields, and generate a signed PDF -
Step 5
Find and manage documents
Browse, preview, download, and archive documents in your library.
- Open your document library to see everything your team has created.
- Preview or download any document you have access to.
- Archive documents you no longer need day to day — they are kept safe, never permanently deleted.
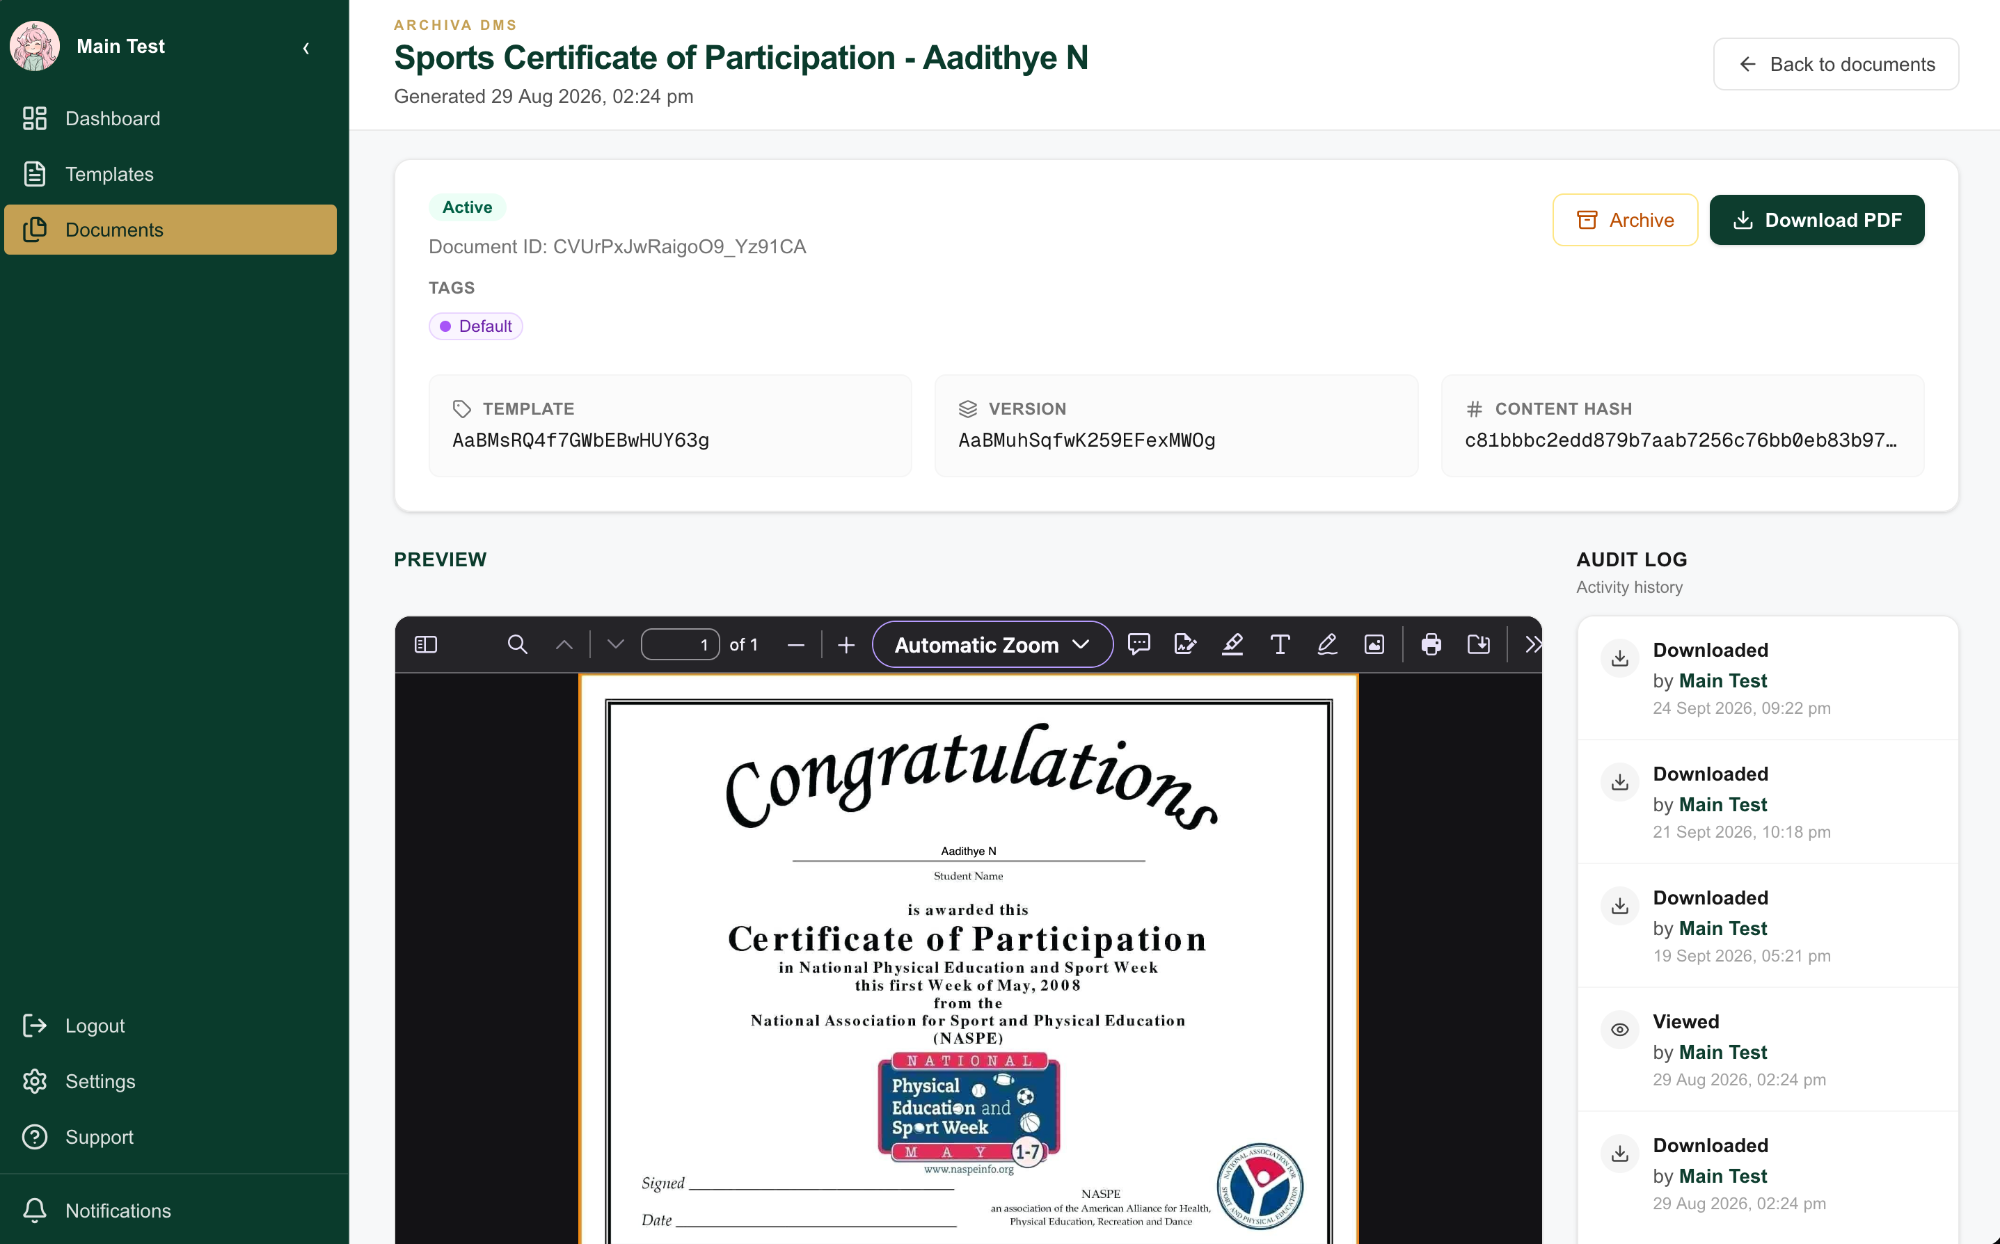
Preview, download, or archive any document in your library -
Step 6
Verify a document is authentic
Check whether a PDF is genuine — inside Archiva or on your own website.
- Inside Archiva, any logged-in user can upload a PDF to verify it.
- For the public, your admin can add a verification tool to your website — no login required.
- Visitors upload the PDF and instantly see whether it is authentic or has been altered.
-
Step 7
Stay on top of things
Use the dashboard and profile settings for day-to-day work.
- Your dashboard shows recent documents, active templates, and storage usage.
- Update your profile, notification preferences, or reset your password anytime.
- Each plan has limits on users, templates, documents, and storage — check the dashboard for current usage.
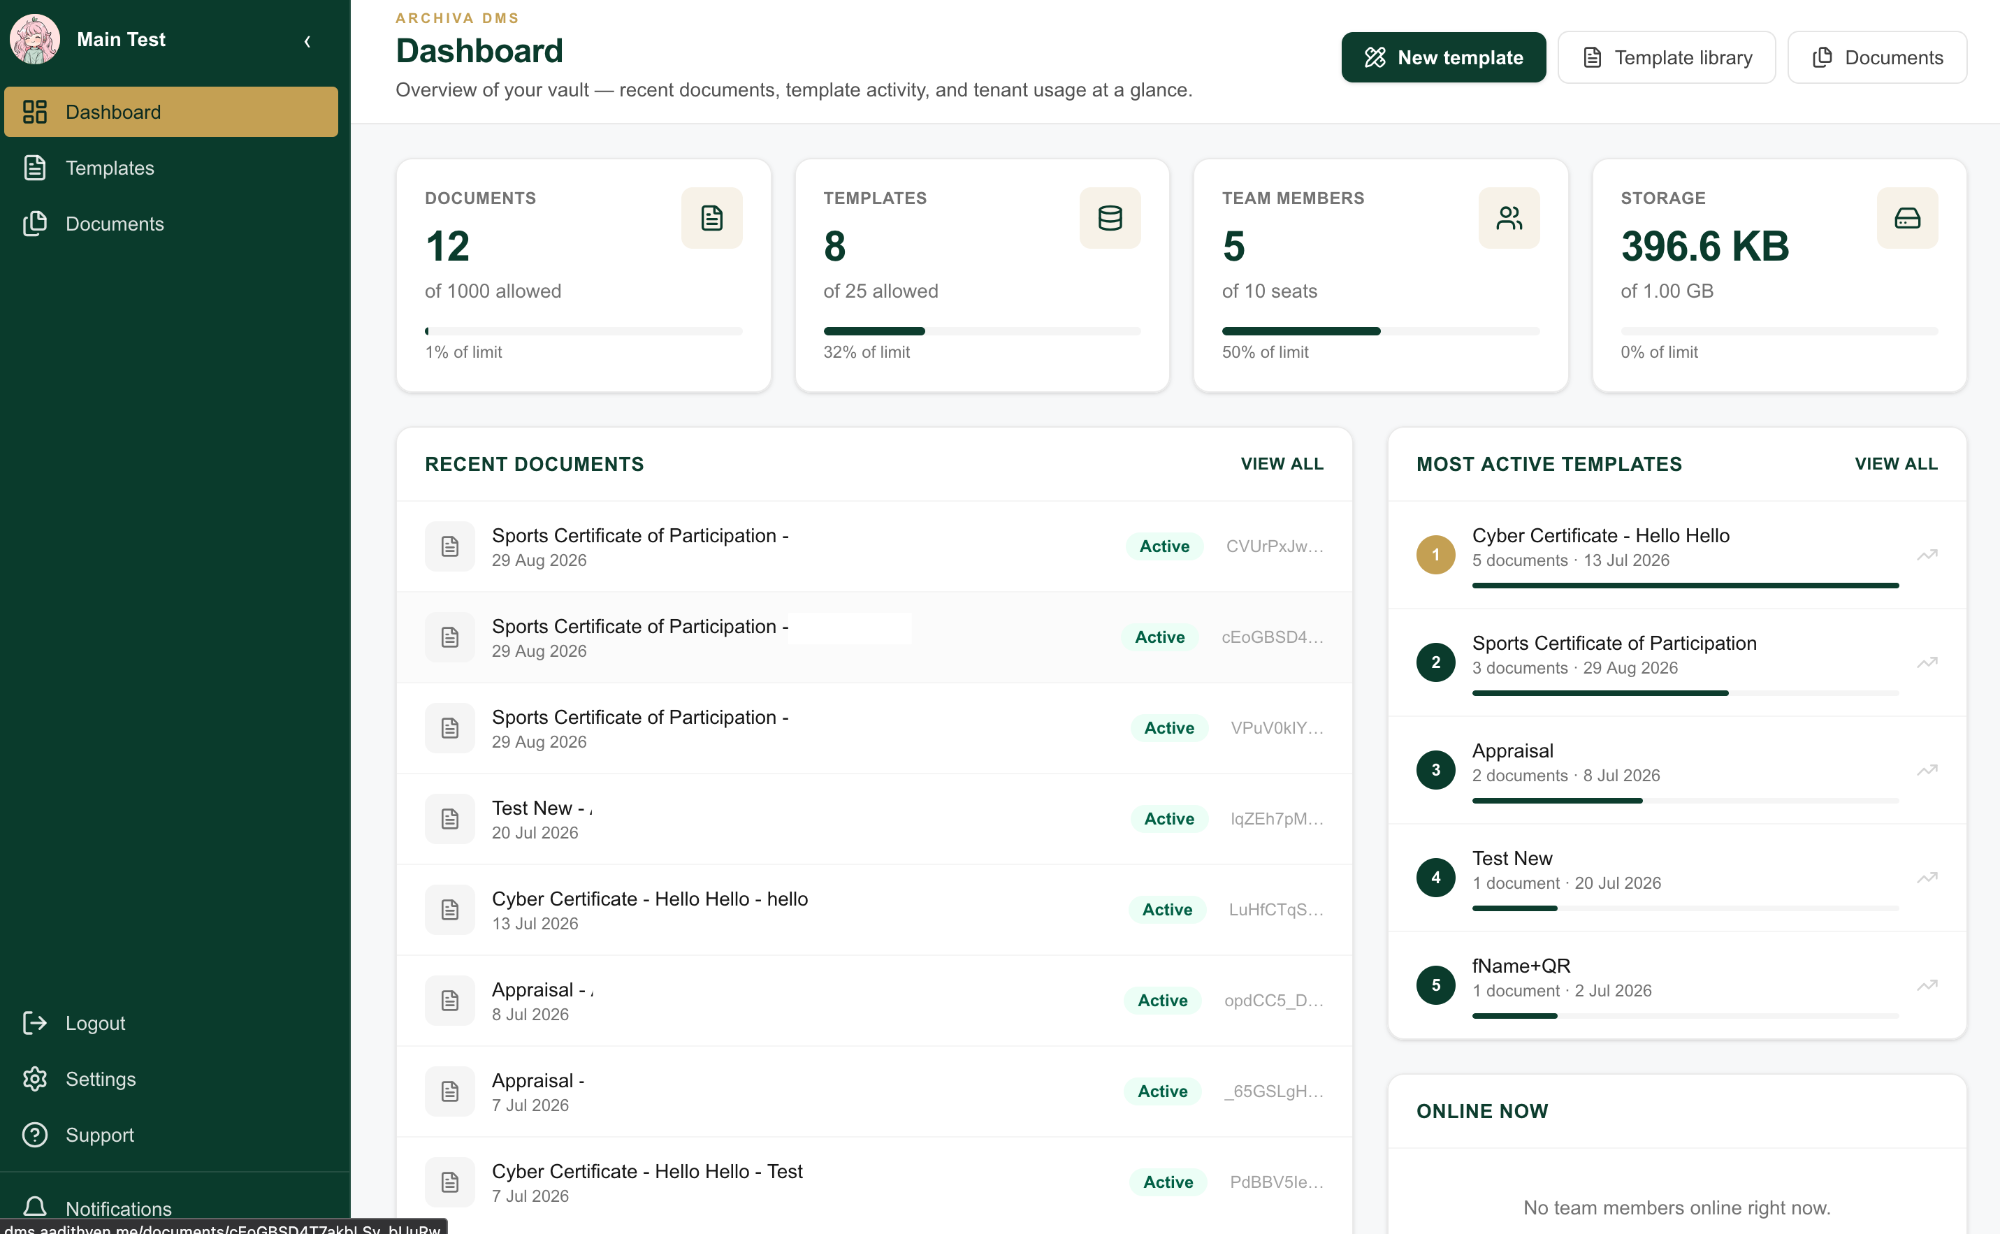
Your dashboard keeps recent activity and usage limits in one place